Saint Nicholas stopped by tonight! We went to see him yesterday already with my nephews and then at home he was super great this year and brought me a gift card for (yeah you guessed it) Svet metraže. And some other treats and I even got some presents from my sister. But that will be another post on Sunday about that because we'll have a family meeting and well, I think I might get some more. :D (I'm very humble, I know.)
Also yesterday we had a party with some friends from Academy and my gift partner brought me an amazing tea set. Thank you, Jernej, so much. It's already in good use.
Also yesterday we had a party with some friends from Academy and my gift partner brought me an amazing tea set. Thank you, Jernej, so much. It's already in good use.
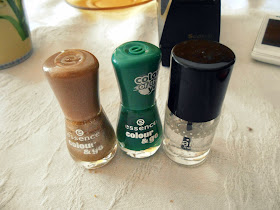
But today's post is not about Nicholas but about my Christmas tree nails I did two days ago. I don't have much equipment so it could be better but I tried my best and here is sort of a tutorial to see how to make your own. Of course the choice of colours is yours. Plus I was in a bit of a rush so there's no base coat, only top one.
 |
| Use tape to create a triangle for the tree. If you're putting a base coat make sure you use a tape that won't peel off that layer. |
 |
| Colour and let it dry. |
 |
| Take the tape off and then decide what colour you'll use for the decorations and what pattern you'll make. |
 |
| I did the strips and a dot on the top, supposedly a star. |
 |
| Add a clear top layer and voila. |
And now you're ready to show off these nails in your fingerless gloves while sipping mulled wine in a decorated city center.
Enjoy your weekend. :)
PS: These guys are amazing!
Enjoy your weekend. :)
PS: These guys are amazing!


Mogoče samo en nasvet: pred slikanjem si odstrani lak, ki je na obnohtni kožici, ker bo tako izgledalo lepše in bolj urejeno ;)
ReplyDeleteDefinitivno, vem, vendar čas ni dovolil tega tokrat. ;)
DeleteHvala.